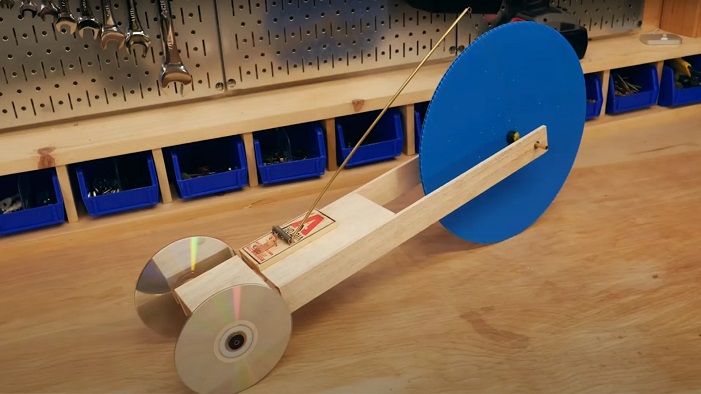
If you’ve ever wanted to learn how to build a mousetrap car, you’re in the right place. I’ve been through the process a few times, and I’m here to share my tips and tricks to help you create a fast and efficient mousetrap car. This project is not only fun but also a great way to understand basic physics and engineering principles. Let’s dive into the step-by-step guide.
What You’ll Need
Before we start building, here’s a list of materials you’ll need:
- Mousetrap: The core of your car. A standard mousetrap will work perfectly.
- Wooden dowels or skewers: These will serve as the axles for your car.
- CDs or plastic bottle caps: These can be used as wheels.
- String: To connect the mousetrap to the axle, powering your car.
- Glue: A strong adhesive like super glue or hot glue.
- Rubber bands: For added traction on the wheels.
- Pliers: To help with bending and securing parts.
Step 1: Prepare the Mousetrap
Start by carefully removing the bait holder from the mousetrap. This part won’t be necessary, and removing it will make it easier to attach other parts. Keep the spring-loaded arm intact, as this will provide the power to move your car.
Step 2: Construct the Chassis
For the chassis (the body of your car), you can use a thin piece of wood, cardboard, or even a plastic base. Make sure it’s lightweight but sturdy. Attach the mousetrap to the center of the chassis using glue. The mousetrap should be secured tightly, as it will provide the force to move your car.
Step 3: Attach the Axles
Next, attach the wooden dowels or skewers to the front and back of the chassis to serve as axles. Make sure they are parallel and can rotate freely. You can secure them with small pieces of straw glued to the chassis, allowing the axles to spin without too much friction.
Step 4: Add the Wheels
Take the CDs or plastic bottle caps and attach them to the ends of the axles. If you’re using CDs, you might want to add some rubber bands around the edges for better traction. Secure the wheels tightly but ensure they can spin freely on the axles.
Step 5: Powering the Car
Now, it’s time to add the power mechanism. Tie one end of the string to the spring-loaded arm of the mousetrap. Wrap the other end around the rear axle, ensuring the string is tight. When the mousetrap is triggered, the string will pull on the axle, causing the wheels to spin and propel the car forward.
Step 6: Test and Adjust
Once everything is assembled, test your mousetrap car. Place it on a flat surface, pull back the spring-loaded arm, and release it to see how far and fast the car goes. If it doesn’t move as expected, check for friction in the axles, adjust the string tension, or try different wheels to optimize performance.
Tips for a Faster Mousetrap Car
- Reduce weight: A lighter car will travel faster. Use lightweight materials wherever possible.
- Increase wheel diameter: Larger wheels can cover more distance per rotation, giving your car an edge in speed.
- Fine-tune the string: Experiment with different string lengths and tensions to find the optimal setup for your car.
Conclusion
Building a mousetrap car is a rewarding project that blends creativity with engineering. By following these steps, you’ll have a functional mousetrap car in no time. Remember, the key to success is testing and tweaking your design until you achieve the perfect balance of speed and distance. Happy building!

