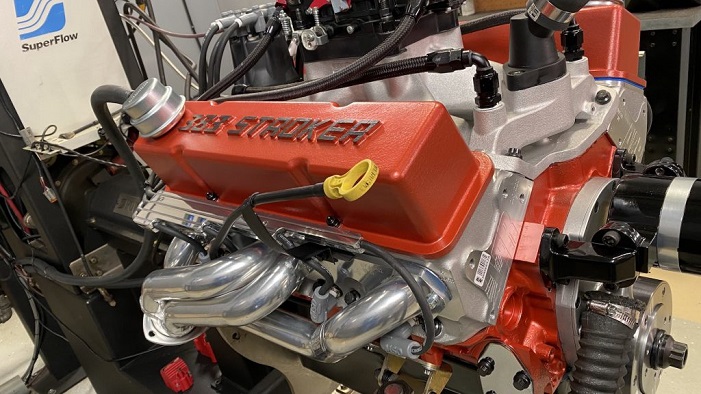
How to Build a Car Engine: A Complete Guide

Building a car engine is a complex and rewarding task that requires a good understanding of mechanics, tools, and patience. As someone who has experience in working with engines, I’ll walk you through the basic steps involved in building a car engine. This guide will cover the essential components and the process, but remember, building an engine requires precision and care.
1. Gather the Necessary Tools and Parts
Before starting, make sure you have all the necessary tools and parts. Here’s a list of what you’ll need:
- Tools: Wrenches, torque wrench, screwdrivers, socket set, engine stand, piston ring compressor, micrometer, and feeler gauges.
- Parts: Engine block, crankshaft, pistons, connecting rods, camshaft, cylinder heads, gaskets, oil pump, timing chain or belt, and other components specific to your engine build.
2. Prepare the Engine Block
The engine block is the foundation of your engine, so it must be clean and in good condition.
- Clean the Block: Start by cleaning the engine block thoroughly, removing any debris, rust, or old gasket material.
- Inspect for Damage: Check the block for cracks or other damage. If you find any issues, you may need to have the block machined or replaced.
- Measure the Cylinders: Use a micrometer to measure the cylinder bores. If they’re worn, you may need to have the block bored and honed by a machine shop.
3. Install the Crankshaft
The crankshaft is the part that converts the linear motion of the pistons into rotational motion.
- Lubricate the Bearings: Apply assembly lube to the main bearings and place them in the engine block.
- Install the Crankshaft: Carefully lower the crankshaft into place, ensuring it’s seated properly on the bearings.
- Torque the Main Caps: Install the main caps over the crankshaft and torque them to the manufacturer’s specifications using a torque wrench.
4. Install the Pistons and Connecting Rods
Pistons and connecting rods are crucial for transferring the force of combustion to the crankshaft.
- Attach Pistons to Connecting Rods: If not already attached, connect the pistons to the connecting rods using wrist pins and retaining clips.
- Install Piston Rings: Fit the piston rings onto the pistons using a piston ring compressor. Ensure the rings are properly oriented.
- Install Pistons into the Block: Use the piston ring compressor to carefully guide the pistons into the cylinder bores. Attach the connecting rods to the crankshaft and torque the rod caps to the specified values.
5. Install the Camshaft and Timing Components
The camshaft controls the opening and closing of the engine’s valves.
- Install the Camshaft: Lubricate the camshaft and slide it into its journals in the engine block.
- Install the Timing Chain/Belt: Align the timing marks on the crankshaft and camshaft gears and install the timing chain or belt. Make sure the timing is set correctly to avoid engine damage.
6. Install the Cylinder Heads
The cylinder heads contain the engine’s valves, and spark plugs, and form the combustion chambers.
- Install Head Gaskets: Place the head gaskets onto the engine block, ensuring they’re aligned with the bolt holes.
- Install the Cylinder Heads: Lower the cylinder heads onto the engine block and torque the head bolts in the correct sequence to the manufacturer’s specifications.
7. Install the Valve Train
The valve train controls the operation of the intake and exhaust valves.
- Install Pushrods and Rocker Arms: If your engine uses pushrods, install them along with the rocker arms. Adjust the valve lash according to the manufacturer’s specs.
- Install the Lifters: Install the lifters into their bores, lubricating them with assembly lube.
8. Install the Oil Pan and Other Components
The oil pan stores the engine’s oil and helps lubricate the engine.
- Install the Oil Pump: Attach the oil pump to the engine block, ensuring it’s properly aligned with the crankshaft.
- Install the Oil Pan: Apply a gasket or sealant to the oil pan flange and bolt it to the bottom of the engine block.
- Install the Remaining Components: Attach any other components such as the intake manifold, exhaust manifold, water pump, and fuel system.
9. Final Assembly and Testing
- Install the Flywheel and Clutch: Attach the flywheel to the crankshaft and bolt the clutch assembly to the flywheel.
- Install the Engine: If you’re ready to install the engine in the car, attach the engine mounts and connect all necessary hoses, wiring, and accessories.
- Prime the Engine: Before starting, prime the oil system by turning the oil pump manually or with a drill. This ensures oil reaches all critical areas.
- Start the Engine: After everything is installed and connected, start the engine and let it run at idle. Check for any leaks or unusual noises.
Conclusion
Building a car engine is a detailed process that requires time, patience, and a solid understanding of mechanics. By following these steps carefully, you can build a reliable engine that will power your car for many miles. Always consult your engine’s service manual for specific instructions and torque specifications to ensure everything is done correctly.


